Resolve QuickBooks Web Connector Error 1039: QuickBooks Error QBWC1039 (Unique File ID Required Error)
QuickBooks web connector error 1039 or QuickBooks error QBWC1039 arrives when a user tries to connect with an application to QuickBooks Desktop through Web Connector. QBWC1039 error also arises when adding the file with a similar configuration you have previously stored inside the QuickBooks application.
Save Time & Effort
Get Help From Expert
Get your accounting work done by experienced accountants. Fix all your accounting software errors & problems. Dial our toll-free number.
+1-877-369-7484How QuickBooks Error QBWC1039 Appears?
When error QBWC1039 prompts, you’ll see the following messages on the PC screen:
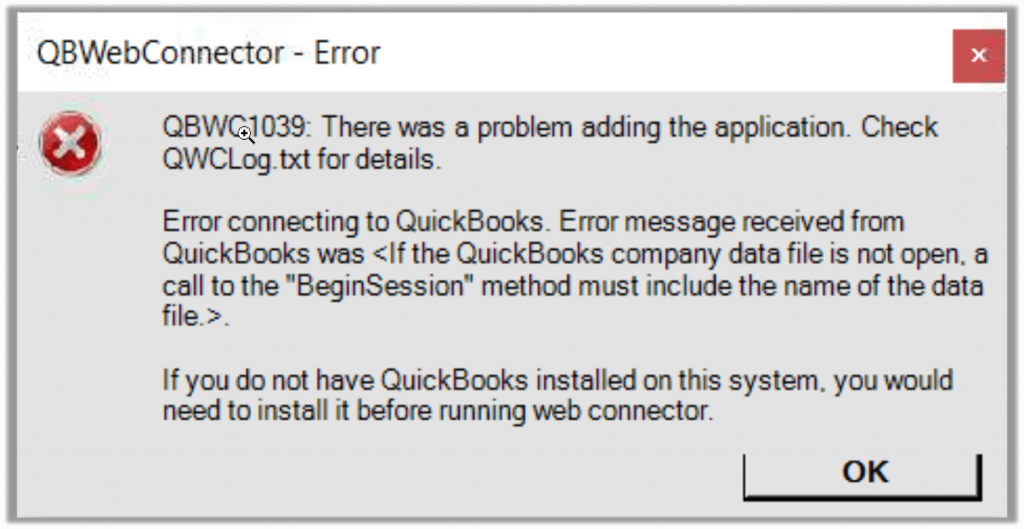
- Error QBWC1039 (When QuickBooks Company File is not open): “QBWC1039: There is a problem in adding the… Check QBWClog.text….. Error connecting to QuickBooks error message received from… <If the QuickBooks company data file is not open, a call to the “Begin Session” method must include the name of the data file>… If you do not have…. web connector.

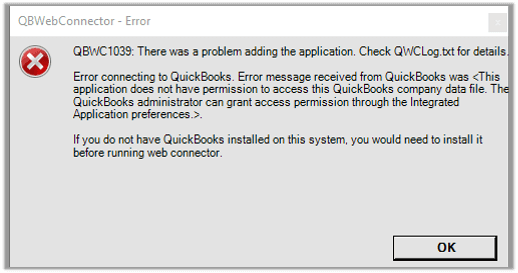
- Error QBWC1039 (When your QuickBooks application has insufficient authorization for accessing the company file ): “QBWC1039: There is a problem in adding the… Check QBWClog.text….. Error connecting to QuickBooks error message received from… <This application doesn’t have permission to access this…. The QuickBooks Administrator authorizes you to add the application through the… If you do not have…. web connector.”

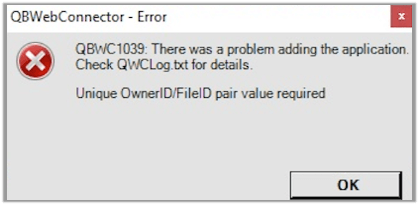
- Error QBWC1039 (When Unique Owner ID or File ID pair value is required): “QBWC1039: There is a problem in adding the…. Check QBWClog.text… Unique OwnerID/FileID…”

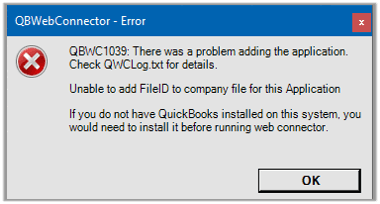
- Error QBWC1039 (When Unable to add FileID to company file for this Application): “QBWC1039: There is a problem in adding the…. Check QBWClog.text… Unable to add FileID to a company for this application… If you do not have …. web connector.”

Causes of QuickBooks Web Connector Error 1039
Before moving further, learn its causes first. There are some reasons behind the occurrence of QBWC error 1039 that are given below:
- The name of the company file has been changed or modified
- Compatibility issues with company file and application
- QuickBooks installation technical glitches
- Missing or corrupted QuickBooks file
- QuickBooks has closed whereas QuickBooks web connector hasn’t properly configured to run
You would like to read: How to Resolve Potential Data issues in QuickBooks
Solutions To Fix Error QBWC1039 in QuickBooks
QuickBooks Error QBWC1039: If the QuickBooks company data file is not open…
This error only prompts when you make some changes by renaming your company file, you have chosen a separate path/drive or third party applications restrict the company file to be opened. This error also arrives when you’re not properly configured your QBWC to run and on the other hand, QuickBooks is quitted.
How to resolve this error?
What to do if you have previously renamed or moved the file
Follow the below steps if you have previously renamed or changed the path to your company file.
- Undo the changes by renaming your company with its previous name. Before doing this ensure that you have created and stored a backup of your company file.
- Now open QuickBooks and reach to the company file where you recently stored it.
- If you don’t remember the exact location then from the home page either press F2 or Ctrl + 1 from your keyboard, this will open the Product Information window for you.
- Write down the location listed in the File Information section and then follow the same path for navigating to the company file.
- Point your cursor and then right-click on the Windows Start button, then you can either open File Explorer for Windows versions (10, 8.1, and 8) or Windows Explorer for Windows versions (Windows 7 & Vista).
- Once your company file has been found simply right-click on it to rename it with its previous name. Company file might displays in the format of [Company name] with .qbw extension or only [Company name] without any extension
- After giving the previous name to your company file simply hit Enter
- Click on the Yes option to approve the changes by giving confirmation
- In case of moving your company file to a different location, at very first take a backup and then restore it to the previously stored location of the company file.
Once everything is successfully done, simply get recommendations with your app support team and also get help in updating their file location to match yours.
If this will not happen already then configure the Web Connector for running properly, but make sure QuickBooks is closed, check out the below-listed steps to do the same:
- Login to QuickBooks with administrative level credentials
- If you work with the multi-user mode of QuickBooks then reach out to the File menu
- Switches the existing mode by clicking on Switch to single-user mode
- Navigate to the Edit menu and then click on Preferences
- Reach out to the Integrated applications and then choose the Company Preferences tab by clicking on it
- Go to the third-party applications and then choose Properties
- Ticked the checkbox if presents that says Allow this application to log in manually otherwise pick this option
- Open the Authorization window where click on the Yes option to give approval to changes
- Next, pick a user to Log in and hit the OK button to end it
QuickBooks Error QBWC1039: This application does not have permission to access the QuickBooks company data file…
This error arrives when the QuickBooks administrator doesn’t grant the full permissions to access the third party application. Due to deficient or lack of authorizations, this error message takes place and starts to appear.
How to resolve this error?
We are highly advised to follow the below steps only if you’re an admin. If you’re not an admin, then contact the QuickBooks admin to ask them to follow the below-listed steps. A user with full administrative level permissions is authorized to follow these steps.
- Login to QuickBooks with administrative level authorization by following the admin credentials
- If you’re using QuickBooks in Multi-user mode, then reach out to the File menu
- Next, switches the existing mode by clicking on Switch to single-user mode
- Navigate to the Edit menu and then click on Preferences
- Reach out to the Integrated applications and then choose the Company Preferences tab by clicking on it
- If you have previously marked the checkbox that says Don’t allow any applications to access this company file simply unchecked it
- If you receive an SDK app authorization popup on your screen, then choose the Yes option to give the approval
- Ticked the checkbox that grants access to your third party applications
- After you all done, hit the Ok option to save all the changes
QuickBooks Error QBWC1039: Unique OwnerID/FileID pair value required…
This error takes place when you’re forcefully adding a similar application once again in QuickBooks that is already present on QuickBooks. To eliminate the error you have to follow some preventive steps listed out below.
How to resolve this error?
- Reach out to QuickBooks Desktop and launch it then navigate to CP3 tool to download the tool
- After you download, open the tool
- Click on the Select File option and then seek for the QWC file in your folder.
- This enables you to put your file inside the Enter QBWC File location and then tap on Open to add the file
- Choose the Remove Stamp option and then reach out to the QuickBooks Application Certificate
- If you receive the QuickBooks Application Certificate popup then click on the Yes option, next hit continue
- Visit and open the Access Confirmation window, then hit Done
- Follow all the on-screen instructions that will appear on your PC screen, then tap on the Ok button
- You’ll shortly receive a notification to get confirmation that says Owner ID has been removed. Hit the Ok button to give the confirmation
- Next, Quit the CP3 tool and then start including the third-party applications in your QB software.
QuickBooks Error QBWC1039: Unable to add FileID to company file for this Application…
The main cause of this error is when you attempt to add a similar application multiple times. Keep note, you’re only eligible to add a similar application once at one location.
How to resolve this error?
- Reach out to QuickBooks Desktop and launch it then navigate to CP3 tool to download the tool
- After you download, open the tool
- Click on the Select File option and then seek for the QWC file in your folder.
- This enables you to put your file inside the Enter QBWC File location and then tap on Open to add the file
- Choose the Remove Stamp option and then reach out to the QuickBooks Application Certificate
- If you receive the QuickBooks Application Certificate popup then click on the Yes option, next hit continue
- Visit and open the Access Confirmation window, then hit Done
- Follow all the on-screen instructions that will appear on your PC screen, then tap on the Ok button
- You’ll shortly receive a notification to get confirmation that says Owner ID has been removed. Hit the Ok button to give the confirmation
- Next, Quit the CP3 tool and then start re-adding the third-party applications in QuickBooks
Steps to Add Web Connector
If your third party web application contains a .qwc file, then it is easy for QuickBooks to be connected. To do this, go and check out the below steps:
- Launch QuickBooks and visit their File menu
- Then seek for Update Web services and click on it
- Open the Web Connector window and then tap on Add application
- Next, browse and navigate to the .qwc file
- Open the .qwc file by clicking on it
If you’re repeatedly getting the error in the installing process of a web connector. Fix the issue by installing and uninstalling the web connector. For doing this just go and check the below steps:
- Press two keys Ctrl + R together from your keyboard to open the Run box
- Open the Run field and then type Control Panel inside it
- Next, hit the OK button, click on Uninstall a Program
- Choose Web Connector and then click on Uninstall
If after checking all the list of programs of the Control Panel, you’re unable to find the QuickBooks web connector then what you have to do is to eliminate the QuickBooks web connector folders from certain locations by following the direct path: C:\Program Files (x86)\Common Files\Intuit\QuickBooks or C:\Program Files\Common Files\Intuit\QuickBooks.
You can also read: How to fix QuickBooks Error 15212
The Bottom Line
QBWC1039 is a frequently occurring issue that can occur with multiple error messages as you can see in the above section. We hope there are no queries left regarding this issue but in case your error still sustains or you want to learn more about the same topic, stress out your mind, just dial our toll-free number to connect your call with one of our dedicated QuickBooks ProAdvisor for alternative solutions.

Comments (0)